Showing posts with label ruffles. Show all posts

Friday, October 16, 2015

Frills Everywhere!

Soooo...I may have a new addiction.  These little skirts are so quick to turn out, and super easy, since I'm basically designing them on the fly.  Each one turns out a little different, while I'm working out the basic numbers for the various sizes.  This second one is a bit bigger than the first, and it's my back-up for little Sabby's gift, in case the first one is too small.  I haven't seen her in a while, and kids have this really annoying habit of getting bigger.
I am super loving these frills lately!
 The ribbing around the waist, as well as the drawstring, means that a bit of growing room is allowed.  I can say from experience with both my girls that there's nothing sadder than finding the most adorable outfit for your little one, only to find they have outgrown it before they can ever wear it again.  Also, because they are so super cute, you will likely be too absorbed in squishing their adorable selves to take any pictures to forever prove how sweet they look...thankfully, little Arya won't likely have this problem, since Daddy's camera-trigger finger would put an Old Western gunslinger to shame.

The one thing that this whole skirt kick has emphasized for me -- which is an ongoing issue I have dealt with my whole life -- is that I have no visual sense of measurement.  I honestly cannot compute distance or size by sight, whether it's an inch or a mile.  I can look at something I've knit and say, "Oh, that's about an inch of ribbing," when it's actually closer to four...or else I can say "Yep, that's a whole six inches of stockinette!" when it's really only two.  As such, sizing is really hard for me.  I can look at something and think that it will fit the intended recipient for sure, when in reality it comes nowhere close.
The black and purple makes me heart this piece

Most of the wearable items I've made so far have been either one-sized or accessories, which is safe for someone like me...but the one thing I wanted when I first started this blog was to learn new things, and that means stepping out of my comfort zone once in a while.  This has definitely been a new experience for me, and while I may never be able to accurately judge the length of a garment on sight, I have at least learned a few things.

First of all, I have come to rely on my trusty measuring tape while I knit, and to double-check the sizing as I go.  Having the exact measurements of the recipient helps, but checking online against market sizing standards helps, too.  Also, I keep a sort of knitting journal, where I record each and every step I take in creating the piece, as well as any variations I make.  Everything from the type of yarn used to how many stitches and rows in each...it's a great help when drafting patterns that other people could use, and it really helps keep track of what works and what might need some tweaking.  All things considered, I might have some new patterns ready to post soon!  Keep an eye out for me on Ravelry, as DizzyStitchin.

Saturday, October 10, 2015

Frilly Skirt!

Ever since I got my Sashay Sparkle, I have been envisioning little frilly skirts.  Like, a ton of little frilly skirts.  For everyone.  It helps that between my friend Lioness and I, we've got three little girls under 8. It's great practice for figuring out different sizes for my patterns, and I have the safety net of knowing that even if the size is a bit off, at least one of the girls will fit it (or grow into it).

A bit of asymmetrical flair adds to the floofy-ness
This was also my first attempt at knitting in the round, and I'm super pleased with the way it turned out.  Rule number one, though, is make sure your stitches aren't twisted when you're joining them, or you'll spend about an hour undoing the rows you've knit and untangling your yarn.  Trust me.

The frills are on the purl-side of the work, which is the inside when you're knitting.  I'd stop every few rows and flip it inside-out to check that it was looking the way I wanted it to, but there was also the added plus that the knit-side ended up looking really cool, with a stripe of color where the frills were on the other side.  Honestly, I think this skirt would look great both ways -- either all ruffles, or with the ruffles just peeking out the bottom.  Hooray for reversible knitwear!
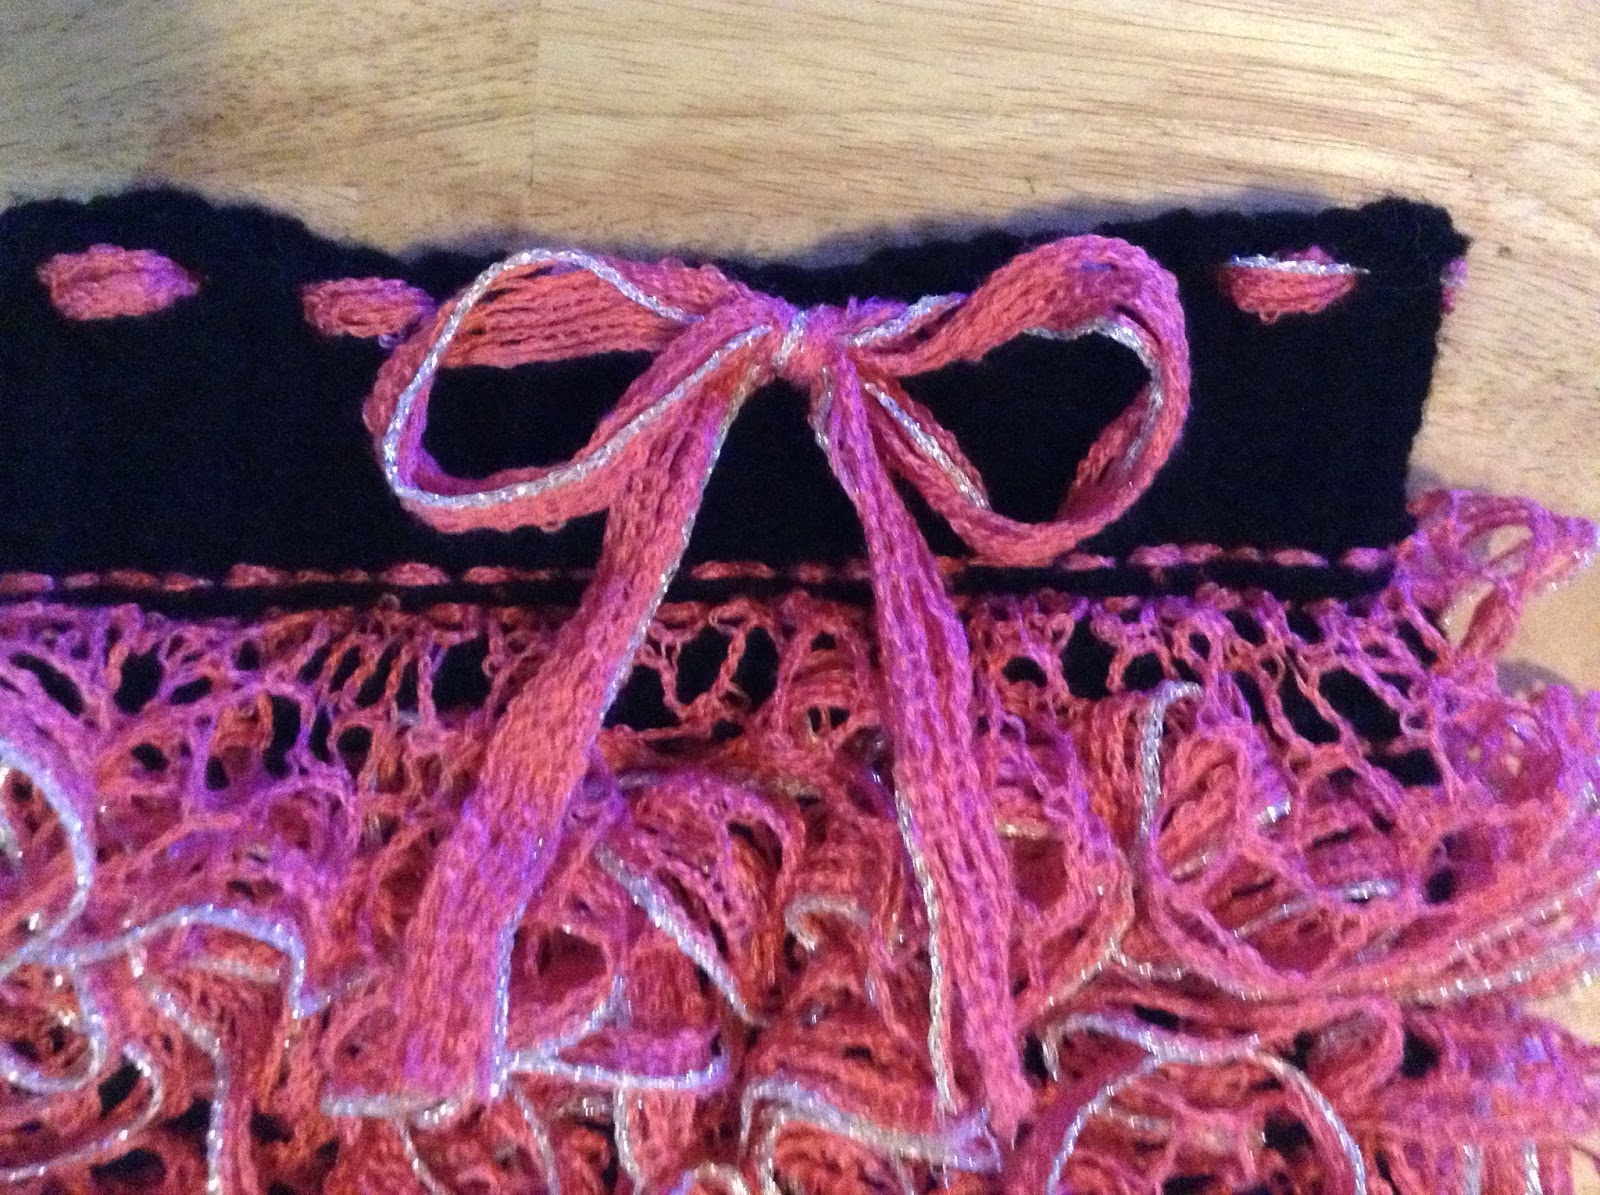
Love the way the black makes the color pop

It has taken me a while to get around to this project, mostly because I was waiting to find the perfect yarn to pair with each of the colors I have in Sashay.  Salmon, rhubarb, and emerald aren't the most common colors at my usual yarn depots, and the vibrancy of the colors made them pretty difficult to match.  Thankfully, inspiration hit me like a Glam-Rock Hair-Band (which may have come from watching too much Glee lately) and I realized I have a ginormous amount of black yarn lying about.  Hello, 80's!  

I used a length of Sashay for the drawstring waistband
I'm still working out the pattern in different sizes (there's a lot more math in knitting than I'd imagined) but for now, this one's going to little Sabby, who turned three last month.  My girls will have to wait, I guess, though probably not long, since I've got a second skirt on the needles already, in a slightly different style.  I have a feeling that there will be an abundance of frilly skirts in the girls' wardrobes shortly.  I'm also thinking up a big-girl version for me, though maybe with a little less frills.
The inside, showing off that little bit of flair

Sunday, July 26, 2015

Ruffles!

Well, it's time to tackle something new and challenging.  I've been playing a lot of Final Fantasy X-2 lately (or, as I like to call it, Final Fantasy - Pretty-Princess-Dress-Me-Up -- those who've played it will understand).  Anyways, I've always loved some of the costumes, and I really like the way that even though the basic form is the same (warrior, thief, mage, etc.) each girl brings her own personal style to it.  Yuna in particular tends to have a lot of lacy bits and -- you guessed it, it's right in the title of this post -- ruffles!


So, having found my muse, I've finally got a project for that lovely, frilly yarn I've had tucked away.  As a big fan of creative styles that can be worn multiple ways, this Yuna-inspired demi-skirt could also double as a shawlette -- wear it however you want!  The best part about designing something is getting inventive and making it your own.

Alrighty then, let's get started; I'll walk you through the process first, and post the pattern at the end.  The yarn I'm using for this is Red Heart Boutique Sashay Sparkle in Emerald, and I'm using my trusty US9 needles...though the needle size doesn't really matter and there's no gauge to speak of, since you're knitting with the pre-made holes in the mesh.  So use whatever you've got to hand.
Casting on has got to be the easiest process I've ever seen...you literally just poke your needle through the hole in the mesh, from back to front.  We're using the second row of holes at the top, away from the sparkly edge, which gives us two strands to work with.  You could use whatever row you'd like, if you want a shorter fringe, but I wouldn't recommend using the top row, as a single strand might not hold up to regular wear-and-tear -- I always like to err on the cautious side.  I started by casting on two stitches, and you simply knit every row, making sure that you loop the yarn twice in the first and last stitch of each row (so row 2 is four stitches, row 3 is six, row 4 is eight, etc).  This will give you a nice smooth increase.
You can see the ruffles starting to take shape.  Keep knitting, always looping the next hole in the mesh over your needle, never the same one you just used.  This will keep the fabric loose and flowy, and avoid any bunching in your ruffles.  No-one wants a ruffly bunch (...of coconuts?  Sorry, that joke was bad, even for me!  That's what writing at 4 am gets you...).
Knitting with mesh is definitely a new experience.
Caius is always willing to "help" mommy knit.  He may or may not have ended up wearing this piece as a cape at one point.  He's asked me not to tell.

Keep going until the piece is the desired length -- you can make it longer or shorter simply by knitting more or fewer rows.  I knit 50 rows (100 stitches), then bound off.  I've decided to add a tie to my demi-skirt, so with a large yarn needle, just weave a length of the same yarn mesh through the top edge of the piece, tie a knot at either end, and voila!  A fancy, frilly fashion accessory that would make Yuna proud!  This'll go great over my pair of black tights.
Simplified pattern:

CO 2 stitches
Kw2, Kw2 (knit with 2 loops)
*Kw2, knit to last stitch, Kw2*
Repeat * until piece is desired length, BO
Lace ties through finished edge

Feel free to leave comments, I'd love to know if this was helpful (or not!) and to hear your own creative ideas!  Share your own take on my designs, and let me know if there's anything you think I can improve!